How to Check Framing for Built-In Items
Built-in items can be set within the framing, once the roofing felt is in place and the house is protected from rain water. Different items are installed by various subcontractors and tradesmen, but the framing and framed openings are crucial to their proper placement.
On this page, you'll learn about building in these items:
- Clothes dryer vent wall box
- Bathtubs, and tub and shower "inserts"
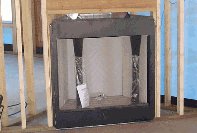
Fireplaces and platforms for soaker tubs will be covered on other web pages.
Clothes dryer vent boxes are furnished and installed by the heating and cooling contractor. Bathtubs, and bathtub and shower inserts, are typically furnished and installed by the plumber, but you have to decide and pick out what you want.
Installing a Dryer Vent Box
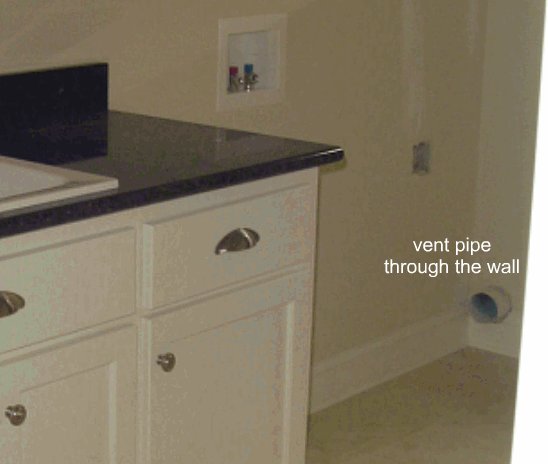
You've probably experienced, as we have, how the vent hose behind a clothes dryer gets bunched, mashed and twisted. Using the normal poke-through-the-wall method shown above, the metal round pipe is installed by the heating and cooling contractor, who usually gives little thought to the best location for where the pipe comes out of the wall.
A typical clothes dryer vent outlet is at the center of the rear of the dryer, at the very bottom (not more than about 2 inches above the floor). When the plain round pipe pokes through the wall, it sticks out too far, is too high above the floor, and usually is not aligned with the dryer vent. Like the unfortunate one above.
A clothes dryer vent box is a built-in item that goes in the wall near the end of the framing stage. When finished, it not only looks better than just poking a round vent pipe through a ragged hole in the drywall, but it works much, much better.
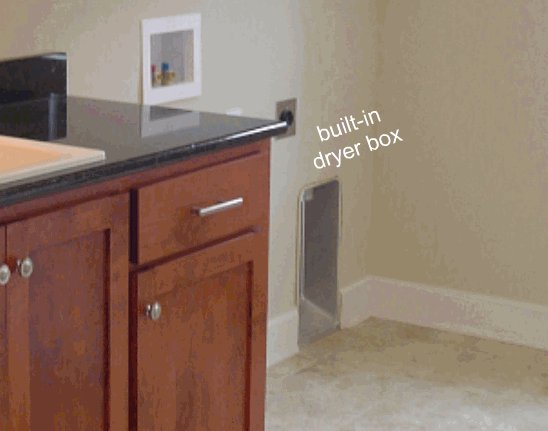
The good news is that the hvac contractor also installs the metal dryer box.
Correct Way to Mount a Dryer Box for a Standard Dryer
The photo above shows a Dryerbox brand unit in one of our houses, unfinished aluminum, that we normally use. Locate where the approximate center of the clothes dryer will be, and make sure the built-in dryer box gets set into the framing at that point. Since the installation instructions for a Dryerbox are stuck to the back side of the box, getting it installed correctly should not be difficult.
Since these always end up hidden behind the appliances, we never paint them. These are available in two depths - for 2x4 stud walls and 2x6 stud walls (or furred 2x4's). They are available for a vent pipe that goes up inside the wall, or down through the floor.
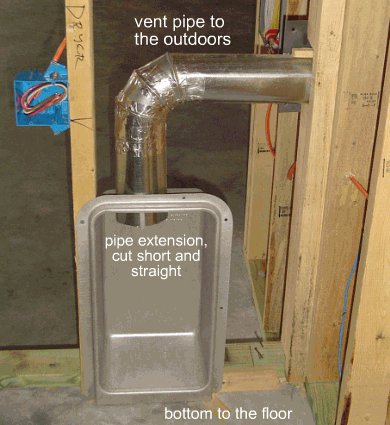
These boxes are also made by other manufacturers, and are fine to use if metal units - never plastic. Use the aluminum foil type vent hoses (not plastic!) and a metal band clamp with adjusting screw for each end of the hose. This type of clamp can be bent into an oval shape that fits the vent pipe.
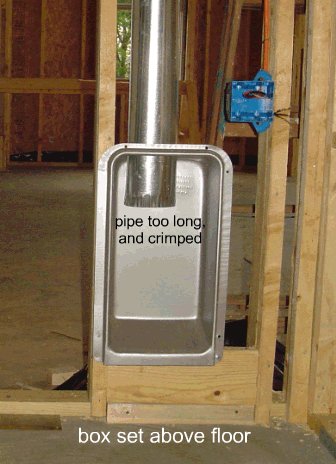
Wrong Way to Mount a Dryer Box
Crimping the end of the pipe creates a place for lint to collect, so talk to the hvac contractor ahead of time about cutting this pipe straight. Setting the box above the floor, as in the picture above, requires two sharp bends in the vent hose, instead of a single smooth sweep when the box is set down on the floor. The exception is when your clothes dryer will be set on a raised platform. Then, the bottom of the dryer box should be set above the floor at the height of the platform.
Built-In Bathtubs and Shower Inserts
The important thing to remember about built-in tubs and showers is that the framing needs to be really close to the actual size of the insert. The manufacturer's literature will show the actual size, and it's usually the same size as the called out size. A 5 foot long tub is actually 5 feet, or 60 inches. The framed space between the walls for a tub or tub/shower insert should be only about 1/8 inch longer than the insert.
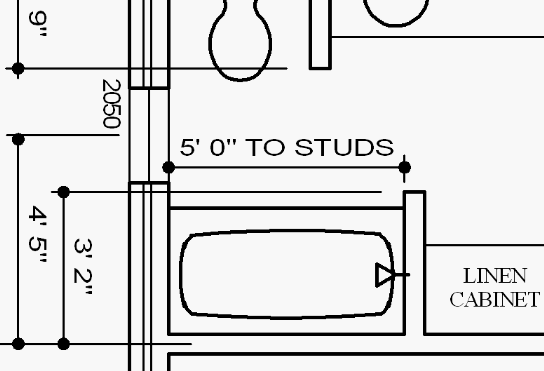
Unfortunately, framers have a tendency to add 1 inch or more where tubs go. When the plumber brings the tub and sets it into place, there will be excess space on one or both ends. The top edges of the tub should be against the studs, so the drywall will lap over the upper edge tub correctly.
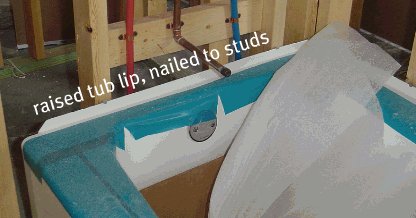
The plumber installed the bathtub, and nailed the angled support wood blocks shown in the photo below. Also notice the blue Protective Products "Trim Protection" tape (4 inches wide) that we use to protect the top edges of the tub from nicks and scratches. Be sure to hold the edge of the tape back slightly from the raised tub lip, so the wall tile won't get laid over the tape. See our page on checking plumbing in the walls.

Keep track of proper framing of your built-in items, and the finished product will be much better.
Return from Framing Built-Ins page to Framing page.


Vic and Susan Hunt are a husband and wife team with over 10 years experience designing and building homes.


Comments
Have your say about what you just read! Leave us a comment or question in the box below.